- Welcome to AMSS++&SMSS.

กระทู้ล่าสุด
#21
ถาม-ตอบเรื่องปัญหาจากการใช้งานและอื่นๆ / Re: ให้นักเรียนเข้าดูข้อมูลเฉพ...
กระทู้ล่าสุด โดย ไท อุบล - 09 สิงหาคม 2017, :20:30:37 หลังเที่ยงอ้างจาก: krubig8972 เมื่อ 08 สิงหาคม 2017, :08:37:16 ก่อนเที่ยง
เมื่อนักเรียนล็อคอินเข้าระบบแล้ว อยากให้สามารถดูได้เฉพาะข้อมูลที่เป็นของนักเรียนเองครับ
เช่น เมนูออมทรัพย์ อยากให้โชว์เฉพาะของตัวนักเรียนเอง โดยไม่ที่ไม่สามารถเห็นของคนอื่นได้ครับ
ขอบคุณครับสำหรับคำแนะนำดีๆ ครับ
#22
ถาม-ตอบเรื่องปัญหาจากการใช้งานและอื่นๆ / ให้นักเรียนเข้าดูข้อมูลเฉพาะขอ...
กระทู้ล่าสุด โดย krubig8972 - 08 สิงหาคม 2017, :08:37:16 ก่อนเที่ยงเมื่อนักเรียนล็อคอินเข้าระบบแล้ว อยากให้สามารถดูได้เฉพาะข้อมูลที่เป็นของนักเรียนเองครับ
เช่น เมนูออมทรัพย์ อยากให้โชว์เฉพาะของตัวนักเรียนเอง โดยไม่ที่ไม่สามารถเห็นของคนอื่นได้ครับ
เช่น เมนูออมทรัพย์ อยากให้โชว์เฉพาะของตัวนักเรียนเอง โดยไม่ที่ไม่สามารถเห็นของคนอื่นได้ครับ
#23
ทิป เทคนิค การติดตั้ง และการใช้งานโปรแกรมอื่นๆ / วิธีใช้งาน TeamViewer เบี้องต้...
กระทู้ล่าสุด โดย ไท อุบล - 01 สิงหาคม 2017, :07:45:46 ก่อนเที่ยงวิธีใช้งาน TeamViewer เบี้องต้น

#24
ทิป เทคนิค ติดตั้งและใช้งานระบบปฏิบัติการ Ubuntu server / How To Install Webmin with SSL...
กระทู้ล่าสุด โดย ไท อุบล - 31 กรกฎาคม 2017, :20:14:23 หลังเที่ยงHow To Install Webmin with SSL on Ubuntu 16.04 LTS and Ubuntu
Install Webmin
To install Webmin via apt-get, you must first add the Webmin repository to your sources.list file.
On your server, open the sources.list file in your favorite text editor. We will use nano in this tutorial:
1. sudo nano /etc/apt/sources.list
then add the following lines to the file:
deb http://download.webmin.com/download/r... sarge contrib
deb http://webmin.mirror.somersettechsolu... sarge contrib
Now add the Webmin GPG key to apt, so the source repository you added will be trusted. This command will do that:
2. wget -q http://www.webmin.com/jcameron-key.asc -O- | sudo apt-key add -
Before installing Webmin, you must update apt-get's package lists:
3.sudo apt-get update
Now run this apt-get command to install Webmin:
4.sudo apt-get install webmin
After the installation is complete, the Webmin service will start automatically.
Log in to Webmin
In a web browser, access your server's Webmin login page via its public IP address (the same IP address you used to login via SSH) on port 10000. By default, Webmin will start with SSL/TLS enabled, so you will need to use HTTPS to connect to it.
#25
ทิป เทคนิค ติดตั้งและใช้งานระบบปฏิบัติการ Ubuntu server / How To Install Linux, Nginx, M...
กระทู้ล่าสุด โดย ไท อุบล - 31 กรกฎาคม 2017, :20:08:27 หลังเที่ยงHow To Install Linux, Nginx, MySQL, PHP (LEMP) Stack On CentOS 7/RHEL 7
LEMP is a combination of operating system and open-source software stack. The acronym LEMP is derived from first letters of Linux, engine-x (Nginx) HTTP Server,MariaDB database, and PHP/Perl/Python.
In this tutorial, we are going to cover how to install LEMP server on Redhat/CentOS 7.
Step 1. Install MariaDB
– Install MariaDB:
# sudo yum install mariadb mariadb-server
– Start / Enable MariaDB:
# sudo systemctl start mariadb
# sudo systemctl enable mariadb
– Secure MySQL:
– To make the MariaDB secure by using the mysql_secure_installation command u can take a look to this tutorial: Securing MySQL server / Mariadb with mysql_secure_installation
Step 2. Install Nginx
– Nginx will not be found in the official CentOS repository, so we need to install the EPEL Repository first.
# sudo yum install epel-release
– Now, install Nginx with following command:
# sudo yum install nginx -y
– Enable / Start Nginx:
# sudo systemctl enable nginx
# sudo systemctl start nginx
– If you are running a firewall, run the following commands to allow HTTP and HTTPS traffic:
# sudo firewall-cmd --permanent --add-service=http # Allow HTTP Traffic
# sudo firewall-cmd --permanent --add-service=https # Allow HTTPS Traffic
# sudo firewall-cmd --reload # Reload firewalld configuration
Step 3. Install PHP and PHP-FPM
– Below is the command to install PHP with php-fpm and common modules.
# yum install php-fpm php-mysql php-cli php
– Start / Enable PHP-FPM:
# sudo systemctl enable php-fpm
# sudo systemctl start php-fpm
Step 4. Configuring Nginx to work with PHP-FPM
-1 Editing php.ini File:
– Open the php.ini file and find the cgi.fix_pathinfo directive, uncomment it by removing the ; and set it to 0:
# sudo vi /etc/php.ini
cgi.fix_pathinfo=0
-2 Editing www.conf file:
# sudo vi /etc/php-fpm.d/www.conf
– Find the listen directive (it should be the first), and verify that it is set to listen for PHP traffic using a Unix socket (instead of port 9000):
listen = /run/php-fpm/php-fpm.sock
– Find the listen.owner and listen.group directives, uncomment them, and modify them as follows:
listen.owner = nginx
listen.group = nginx
– Find the Unix user/group of processes section, and change the user and group from apache to nginx:
user = nginx
group = nginx
– Save and close the file:
3- Restart PHP-FPM:
# sudo systemctl restart php-fpm
4- Create a new Nginx configuration file:
# sudo vi /etc/nginx/conf.d/default.conf
– Paste the following code into this file:
server {
listen 80;
server_name your_server_ip;
# note that these lines are originally from the "location /" block
root /usr/share/nginx/html;
index index.php index.html index.htm;
location / {
try_files $uri $uri/ =404;
}
error_page 404 /404.html;
error_page 500 502 503 504 /50x.html;
location = /50x.html {
root /usr/share/nginx/html;
}
location ~ \.php$ {
try_files $uri =404;
fastcgi_pass unix:/var/run/php-fpm/php-fpm.sock;
fastcgi_index index.php;
fastcgi_param SCRIPT_FILENAME $document_root$fastcgi_script_name;
include fastcgi_params;
}
}
– Save and close the file:
– Restart Nginx:
# sudo systemctl restart nginx
Step 5. Verify and Test PHP
– Create an info.php file to ensure PHP is running:
# sudo vi /usr/share/nginx/html/info.php
– Paste the following content:
<?php phpinfo(); ?>
– Open in the web browser:
http://your server's IP address/info.php
We hope this tutorial was enough Helpful. If you need more information, or have any questions, just comment below and we will be glad to assist you!
#26
ทิป เทคนิค ติดตั้งและใช้งานระบบปฏิบัติการ Ubuntu server / How To Install Linux, Nginx, M...
กระทู้ล่าสุด โดย ไท อุบล - 31 กรกฎาคม 2017, :19:52:36 หลังเที่ยงHow To Install Linux, Nginx, MySQL, PHP LEMP stack in Ubuntu 16.04
#27
ทิป เทคนิค ติดตั้งและใช้งานระบบปฏิบัติการ Ubuntu server / ทำ Proxy Server ด้วย varnish (...
กระทู้ล่าสุด โดย ไท อุบล - 12 กรกฎาคม 2017, :21:45:28 หลังเที่ยงทำ Proxy Server ด้วย varnish (เร็วกว่า Squid)
ตัวอย่างนี้เป็นการติดตั้ง Varnish on Ubuntu Server 16.04
ก่อนอื่น login ด้วยสิทธิ์ root
อัพเดท server
sudo apt-get update
ติดตั้งvarnish
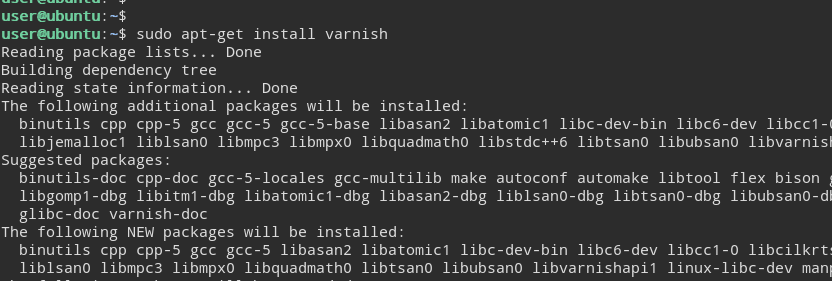
sudo apt-get install varnish -y
ติดตั้งเสร็จแก้ไขค่าคอนฟิก
nano /etc/default/varnish
แก้ port จาก
DAEMON_OPTS="-a :6081 \
เป็น
DAEMON_OPTS="-a :80 \
แก้ Varnish VCL configuration
nano /etc/varnish/default.vcl
เป็น
backend default {
.host = "127.0.0.1";
.port = "8080";
}
แก้ port หากใช้ Apache Virtualhost
nano /etc/apache2/sites-enabled/000-default.conf
จาก
<VirtualHost *:80>
เป็น
<VirtualHost *:8080>
Restart Apache and Varnish
systemctl restart apache2.service
systemctl restart varnish.service
เช็กการทำงาน check the process
ps aux | grep vcache
---------------------------------------
vcache 15569 0.0 0.7 125044 7816 ? Ss 08:20 0:00 /usr/sbin/varnishd -j unix,user=vcache -F -a :6081 -T localhost:6082 -f /etc/varnish/default.vcl -S /etc/varnish/secret -s malloc,256m
vcache 15581 0.0 9.3 272012 94900 ? Sl 08:20 0:00 /usr/sbin/varnishd -j unix,user=vcache -F -a :6081 -T localhost:6082 -f /etc/varnish/default.vcl -S /etc/varnish/secret -s malloc,256m
--------------------------------------
แก้ port arnish.service
nano /lib/systemd/system/varnish.service
จาก
[...]
ExecStart=/usr/sbin/varnishd -j unix,user=vcache -F -a :6081 -T localhost:6082 -f /etc/varnish/default.vcl -S /etc/varnish/secret -s malloc,256m
[...]
เป็น
[...]
ExecStart=/usr/sbin/varnishd -j unix,user=vcache -F -a :80 -T localhost:6082 -f /etc/varnish/default.vcl -S /etc/varnish/secret -s malloc,256m
[...]
Reload and restart Apache and Varnish
systemctl daemon-reload
systemctl restart apache2.service
systemctl restart varnish.service
เช็กการทำงาน
varnishstat
เช็กการทำงานออนเว็บ
curl -I http://your_ip
---------------------------------------
HTTP/1.1 200 OK
Date: Wed, 22 Jun 2016 08:32:03 GMT
Server: Apache/2.4.18 (Ubuntu)
Last-Modified: Wed, 22 Jun 2016 08:18:20 GMT
Vary: Accept-Encoding
Content-Type: text/html
X-Varnish: 32771
Age: 0
Via: 1.1 varnish-v4
ETag: W/"2c39-535d9949460b3-gzip"
Accept-Ranges: bytes
Connection: keep-alive
----------------------------
แสดงว่าการทำงานถูกต้อง End
ตัวอย่างนี้เป็นการติดตั้ง Varnish on Ubuntu Server 16.04
ก่อนอื่น login ด้วยสิทธิ์ root
อัพเดท server
sudo apt-get update
ติดตั้งvarnish
sudo apt-get install varnish -y
ติดตั้งเสร็จแก้ไขค่าคอนฟิก
nano /etc/default/varnish
แก้ port จาก
DAEMON_OPTS="-a :6081 \
เป็น
DAEMON_OPTS="-a :80 \
แก้ Varnish VCL configuration
nano /etc/varnish/default.vcl
เป็น
backend default {
.host = "127.0.0.1";
.port = "8080";
}
แก้ port หากใช้ Apache Virtualhost
nano /etc/apache2/sites-enabled/000-default.conf
จาก
<VirtualHost *:80>
เป็น
<VirtualHost *:8080>
Restart Apache and Varnish
systemctl restart apache2.service
systemctl restart varnish.service
เช็กการทำงาน check the process
ps aux | grep vcache
---------------------------------------
vcache 15569 0.0 0.7 125044 7816 ? Ss 08:20 0:00 /usr/sbin/varnishd -j unix,user=vcache -F -a :6081 -T localhost:6082 -f /etc/varnish/default.vcl -S /etc/varnish/secret -s malloc,256m
vcache 15581 0.0 9.3 272012 94900 ? Sl 08:20 0:00 /usr/sbin/varnishd -j unix,user=vcache -F -a :6081 -T localhost:6082 -f /etc/varnish/default.vcl -S /etc/varnish/secret -s malloc,256m
--------------------------------------
แก้ port arnish.service
nano /lib/systemd/system/varnish.service
จาก
[...]
ExecStart=/usr/sbin/varnishd -j unix,user=vcache -F -a :6081 -T localhost:6082 -f /etc/varnish/default.vcl -S /etc/varnish/secret -s malloc,256m
[...]
เป็น
[...]
ExecStart=/usr/sbin/varnishd -j unix,user=vcache -F -a :80 -T localhost:6082 -f /etc/varnish/default.vcl -S /etc/varnish/secret -s malloc,256m
[...]
Reload and restart Apache and Varnish
systemctl daemon-reload
systemctl restart apache2.service
systemctl restart varnish.service
เช็กการทำงาน
varnishstat
เช็กการทำงานออนเว็บ
curl -I http://your_ip
---------------------------------------
HTTP/1.1 200 OK
Date: Wed, 22 Jun 2016 08:32:03 GMT
Server: Apache/2.4.18 (Ubuntu)
Last-Modified: Wed, 22 Jun 2016 08:18:20 GMT
Vary: Accept-Encoding
Content-Type: text/html
X-Varnish: 32771
Age: 0
Via: 1.1 varnish-v4
ETag: W/"2c39-535d9949460b3-gzip"
Accept-Ranges: bytes
Connection: keep-alive
----------------------------
แสดงว่าการทำงานถูกต้อง End
#28
ถาม-ตอบเรื่องปัญหาจากการใช้งานและอื่นๆ / Re: ผู้ใช้ที่ใช้เน็ต MOE-net แ...
กระทู้ล่าสุด โดย ไท อุบล - 23 เมษายน 2017, :10:25:09 ก่อนเที่ยงขอบคุณครับที่แจ้งปัญหา
คงเกี่ยวกับการปรับปรุงระบบ ของ Moenet & TOT ในแต่ละโซนครับ
ISP ส่วนใหญ่ที่ใช้บริการ คือ TOT ครับ มี CAT หรือ 3BB บ้างบางส่วนครับ
ตอนนี้คงเข้าที่แล้วนะครับ
ลองเทส speed ดูนะครับ
http://speedtest.moe.go.th/
ติดขัดเรื่อง Moenet โทรสายตรงเลยก็ได้นะครับ ไปที่ สป.
0891357809 Montana Sowkiatrung
คงเกี่ยวกับการปรับปรุงระบบ ของ Moenet & TOT ในแต่ละโซนครับ
ISP ส่วนใหญ่ที่ใช้บริการ คือ TOT ครับ มี CAT หรือ 3BB บ้างบางส่วนครับ
ตอนนี้คงเข้าที่แล้วนะครับ
ลองเทส speed ดูนะครับ
http://speedtest.moe.go.th/
ติดขัดเรื่อง Moenet โทรสายตรงเลยก็ได้นะครับ ไปที่ สป.
0891357809 Montana Sowkiatrung
#29
ถาม-ตอบเรื่องปัญหาจากการใช้งานและอื่นๆ / Re: ผู้ใช้ที่ใช้เน็ต MOE-net แ...
กระทู้ล่าสุด โดย ทวีศักดิ์ ธรรมวันนา - 21 เมษายน 2017, :11:49:29 ก่อนเที่ยงวันนี้ 21 เม.ย.60
เข้าระบบ AMSS++ ด้วย MOEnet ในสำนักงานปุ่ม คลิก สามารถเปิด PopUp ไฟล์แนบได้ แล้วครับ
คาดว่า รร.ที่ใช้เครือข่าย MOEnet / TOT อื่นๆ น่าจะเป็นปกติแล้ว ครับ
เข้าระบบ AMSS++ ด้วย MOEnet ในสำนักงานปุ่ม คลิก สามารถเปิด PopUp ไฟล์แนบได้ แล้วครับ
คาดว่า รร.ที่ใช้เครือข่าย MOEnet / TOT อื่นๆ น่าจะเป็นปกติแล้ว ครับ
#30
ถาม-ตอบเรื่องปัญหาจากการใช้งานและอื่นๆ / Re: ผู้ใช้ที่ใช้เน็ต MOE-net แ...
กระทู้ล่าสุด โดย ทวีศักดิ์ ธรรมวันนา - 19 เมษายน 2017, :10:31:23 ก่อนเที่ยงตอบผู้พัฒนาระบบ
ลองตรวจสอบ ตามที่แนะนำแล้ว
ยังคลิกเปิดแฟ้มแนบไม่ได้ ไม่ว่าจะใช้ browser ใดๆ
มาใช้ใน สนง.เขต ที่เป็นเครือข่าย MOE net หรือ สาย ADSL เช่ารายเดือนจาก TOT
หรือ TOT ที่บ้าน ก็พบปัญหาเดียวกัน คือ เปิดไฟล์แนบไม่ได้
แต่ถ้าเป็น Uninet / 3ฺฺBB / CAT / DTAC / AIS / True เปิดได้ไม่มีปัญหา ครับ
ตอนที่เป็นครั้งแรก อยู่ดีๆ ก็เป็นปกติ คิดว่า ทาง TOT คงแก้ไขให้เอง
แต่ตอนนี้ ยังไม่ปกติ รร.ไม่สามารถใช้ MOE-net ที่ รร. หรือ ที่ สน.เขต เปิดได้เลย
ที่ว่าส่วนใหญ่ ไม่มีปัญหา ได้ใช้ เครือข่าย MOE-net หรือ TOT เหมือนกัน หรือใช้ เครือข่ายอื่น เปิดครับ
ปัญหาไม่ได้เป็น เฉพาะ AMSS++ แต่เป็นทุกเว็บ ที่ใช้ POP-UP เปิดไฟล์ครับ
เราไม่สามารถควบคุมเครือข่ายได้ แต่ ถ้าเพิ่มปุ่มที่ไม่ใช้ pop-up ให้สามารถ เพียงเปิดอ่านไฟล์แนบ ได้
ผมคิดว่า จะทำให้ ระบบ สมบูรณ์มากขึ้น หรือ จะช่วยประสานทาง TOT เพื่อให้ทราบปัญหานี้ ด้วยเช่นกัน ครับ
ขอบคุณที่รับทราบปัญหา ครับ